CloudBees is a cloud platform providing repository, CI service (Jenkins) and server for your apps. So everything you need to develop, test and deploy. There are many options, e.g. repository can be Git or SVN, for server you can choose Jetty, Tomcat, Glassfish, JBoss, Wildfly etc. It is also possible to run standalone applications, which are provided with port number, so you can start your own server. And that’s the case we’ll cover here.
spray.io is Scala framework for web apps. It allows you to create standalone web-apps (starting their own server, spray-can) or somewhat limited .war ones (spray-servlet), which you can deploy on JEE server like Glassfish, JBoss etc. We are going to use standalone here.
You can clone the app from github Let’s take a quick look at it now.
The app
Boot
The Boot file is Scala App, so it’s like java class with main method. It’s runnable. It creates Service actor, which is handling all the HTTP requests. It also reads port number from app.port system property and binds the service to the host and port. app.port is provided by CloudBees, if you want to run the app locally, you need to set it e.g. by jvm command line -Dapp.port=8080.
Service
Service has MyService trait, which handles routing to empty path only. Yes, the app is not very complicated ;)
Buildfile
build.gradle file is a bit more interesting. Let’s start from it’s end.
mainClassNameattribute is set to Scala App. This is the class that is going to be run when you run it locally from command line bygradlew run.applicationDefaultJvmArgsis set to-Dapp.port=8080and it’s also necessery for running locally from gradle. This way we set port whichServiceis going to be bound to.jar.archiveNameis a setting used to set generated .jar name. Without it it’s dependent on the project directory name.
You can run the application by issuing gradlew run (make sure gradlew file is executable). When it’s running, you can point your browser to http://localhost:8080 and you should see “Say hello to spray-routing on spray-can!” Nothing fancy, sorry.
There is also “cb” task definde for gradle. If you issue gradlew cb, it builds zip file, with all the dependency .jars, and szjug-sprayapp-1.0.jar in it’s root. This layout is necessary for CloudBees stand alone apps.
Deploy to CloudBees
First you need to create an account on CloudBees. If you have one, download CloudBees SDK - so you can run commands from your command line. On Mac, I prefer brew install, but you are free to choose your way.
When installed, run bees command. When run for the first time, it asks your login/password, so you don’t need to provide it every time you want to use bees.
Build .zip we’ll deploy to the cloud. Go into the app directory (szjug-sprayapp) and issue gradlew cb command. This command not only creates the .zip file, it also prints .jars list useful to pass to bees command as classpath.
Deploy the application with the following command run from szjug-sprayapp directory:
bees app:deploy -a spray-can -t java -R class=pl.szjug.sprayapp.Boot -R classpath=spray-can-1.3.1.jar:spray-routing-1.3.1.jar:spray-testkit-1.3.1.jar:akka-actor_2.10-2.3.2.jar:spray-io-1.3.1.jar:spray-http-1.3.1.jar:spray-util-1.3.1.jar:scala-library-2.10.3.jar:spray-httpx-1.3.1.jar:shapeless_2.10-1.2.4.jar:akka-testkit_2.10-2.3.0.jar:config-1.2.0.jar:parboiled-scala_2.10-1.1.6.jar:mimepull-1.9.4.jar:parboiled-core-1.1.6.jar:szjug-sprayapp-1.0.jar build/distributions/szjug-sprayapp-1.0.zip
And here abbreviated version for readability:
bees app:deploy -a spray-can -t java -R class=pl.szjug.sprayapp.Boot -R classpath=...:szjug-sprayapp-1.0.jar build/distributions/szjug-sprayapp-1.0.zip
spray-can is an application name, -t java is application type. -R are CloudBees properties, like class to run and classpath to use. Files for classpath are helpfully printed when gradle runs cb task, so you just need to copy & paste.
And that’s it! Our application is running on the CloudBees server. It’s accessible at the URL from CloudBees console.

Use CloudBees services
The app is deployed on CloudBees, but is that all? As I mentioned we could also use git repository and Jenkins. Let’s do it now.
Repository (Git)
Create new git repository on your CloudBees account. Choose “Repos” on the left, “Add Repository”… it’s all pretty straightforward.
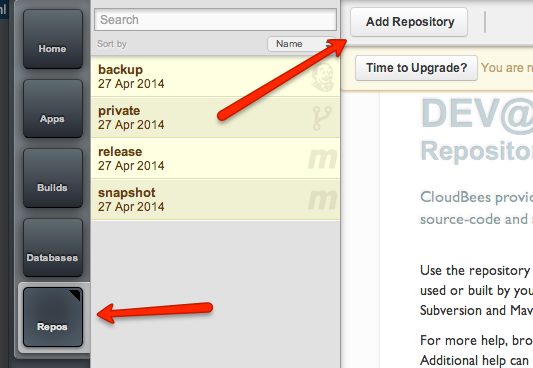
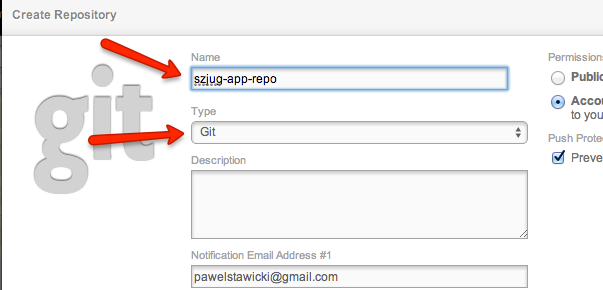
Name it “szjug-app-repo” and remember it should be Git.
Next add this repository as remote one to your local git repo. On the repositories page on your CloudBees console there is very helpful cheetsheet about how to do it.
First add git remote repository. Let’s name it cb
git remote add cb ssh://git@git.cloudbees.com/pawelstawicki/szjug-app-repo.git
Then push your commits there:
git push cb master
Now you have your code on CloudBees.
CI build server (Jenkins)
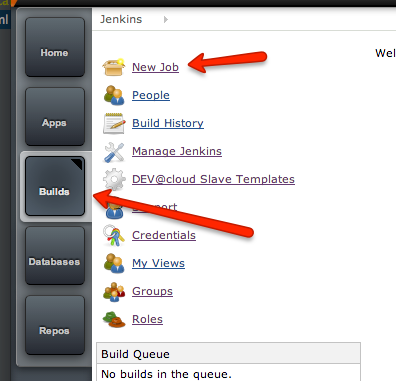
It’s time to configure the app build on CI server. Go to “Builds”. This is where Jenkins lives. Create new “free-style” job.

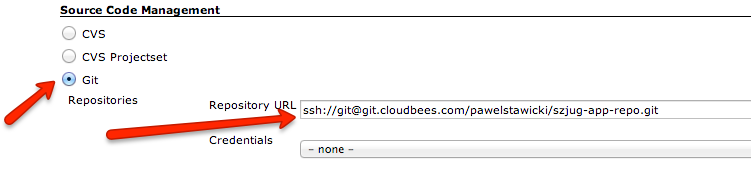
Set your git repository to the job, so that Jenkins checks out always fresh code version. You’ll need the repository URL. You can take it from “Repos” page.

Set the URL here:
Next thing to set up is gradle task. Add next build step of type “Invoke gradle script”. Select “Use Gradle Wrapper” - this way you can use gradle version provided with the project. Set “cb” as the gradle task to run.

Well, that’s all you need to have the app built. But we want to deploy it, don’t we? Add post-build action “Deploy applications”. Enter Application ID (spray-can in our case, region should change automatically). This way we tell Jenkins where to deploy. It also needs to know what to deploy. Enter build/distributions/szjug-app-job-*.zip as “Application file”.

Because you deployed the application earlier from the command line, settings like application type, main class, classpath etc. are already there and you don’t need to provide it again.
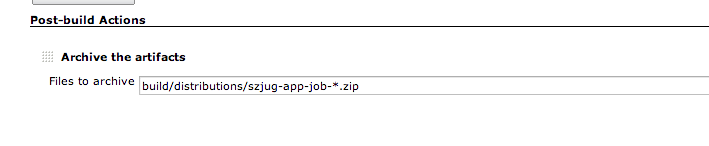
It might also be useful to keep the zip file from each build, so we can archive it. Just add post-build action “Archive the artifacts” and set the same zip file.
Ok, that’s all for build configuration on Jenkins. Now you can hit “Build now” link and the build should be added to the queue. When it is finished, you can see the logs, status etc. But what’s more important, the application should be deployed and accessible to the whole world. You can now change something in it, hit “Build now” and after it’s finished, check if the changes are applied.
Tests
Probably you also noticed there is a test attached. You can run it by gradlew test. It’s specs2 test, with trait MyService so we have access to myRoute, and Specs2RouteTest so we have access to spray.io testing facilities.
@RunWith(classOf[JUnitRunner]) is necessary to run tests in gradle.
Now when we have tests, we’d like to see tests results. That’s another post-build step in Jenkins. Press “Add post-build action” -> “Publish JUnit test result report”.
Gradle doesn’t put test results where maven does, so you’ll need to specify the location of report files.

When it’s done, next build should show test results.
Trigger build job
You now have build job able to build, test and deploy the application. However, this build is going to run only when you run it by hand. Let’s make it run every day, and after every change pushed to the repository.

Summary
So now you have everything necessary to develop an app. Git repository, continous integration build system, and infrastructure to deploy the app to (actually, also continously).
Think of your own app, and… happy devopsing ;)